PhpSpreadsheetをサクラサーバーにインストールする方法
PhpSpreadsheetをサクラサーバーやMacのMAMPにインストールする方法です。調べているとcomposerを使ってインストールとあるのですがそのあたりの情報やインストールはできたものの動いてるのかどうかなどまとめました。
簡単にまとめていますのでご一読ください。
PhpSpreadsheetをインストール目次
ちなみにMacにインストールしたPhpSpreadsheetをアップロードしても使えます。
PhpSpreadsheetをサクラサーバーにインストール
まずはSSHでログインする
Macのアプリケーション:ユーティリティにあるターミナルを起動します。
サクラのアドレスとログインIDですが、契約時にFTP情報が届いたと思いますのでそれを使います。
FTPサーバ名 : xxxxxxxx.sakura.ne.jp
FTPアカウント : xxxxxxxx
FTP初期フォルダ : www
サーバパスワード: passwordxxxx
こんな感じだと思います。[xxxxxxxx]がログインIDで[passwordxxxx]がパスワード。これは人によって違います。
sshログイン方法
ターミナルに下記のように入力します。ログインID@FTPサーバ名です
ssh xxxxxxxx@xxxxxxxx.sakura.ne.jp
Are you sure you want to continue connecting (yes/no)?と聞かれる場合はyesとタイプします。
間違いがなければパスワードを聞かれますので、上のパスワードを入力します。
xxxxxxxx@xxxxxxxx.sakura.ne.jp's password:
passwordxxxx
Welcomeが出れば成功です。
Welcome to FreeBSD!
composerのインストール
続いてcomposerをインストールします。PhpSpreadsheetはこのcomposerを使ってインストールします。
curl -sS https://getcomposer.org/installer | php
下のようにsuccessfullyが出れば成功です。
All settings correct for using Composer
Downloading...

Composer (version 1.8.5) successfully installed to: /home/xxxxxxxx/composer.phar
Use it: php composer.phar
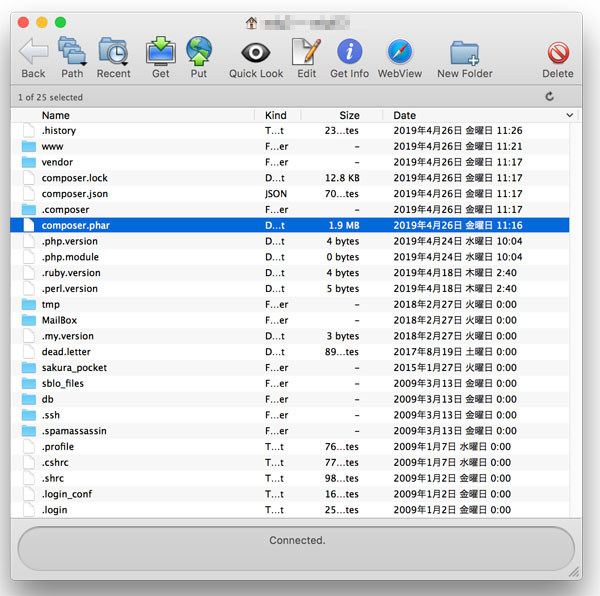
うまくいったかいちおうFTPで確認するとcomposer.pharは/home/xxxxxxxx/直下にありました。
PhpSpreadsheetのインストール
続いてインストールです。上で[Use it: php composer.phar]と書かれていますので[composer.phar]を指定します。場所は[/home/xxxxxxxx/]にあったので下記にようにターミナルに入力します。
/home/xxxxxxxx/composer.phar require phpoffice/phpspreadsheet
ダウンロードが始まりしばらくすると下記のようになります。
Using version ^1.6 for phpoffice/phpspreadsheet
./composer.json has been created
Loading composer repositories with package information
Updating dependencies (including require-dev)
Package operations: 4 installs, 0 updates, 0 removals
  - Installing markbaker/matrix (1.1.4): Downloading (100%)
  - Installing markbaker/complex (1.4.7): Downloading (100%)
  - Installing psr/simple-cache (1.0.1): Downloading (100%)
  - Installing phpoffice/phpspreadsheet (1.6.0): Downloading (100%)
phpoffice/phpspreadsheet suggests installing mpdf/mpdf (Option for rendering PDF with PDF Writer)
phpoffice/phpspreadsheet suggests installing dompdf/dompdf (Option for rendering PDF with PDF Writer)
phpoffice/phpspreadsheet suggests installing tecnickcom/tcpdf (Option for rendering PDF with PDF Writer)
phpoffice/phpspreadsheet suggests installing jpgraph/jpgraph (Option for rendering charts, or including charts with PDF or HTML Writers)
Writing lock file
Generating autoload files
またまたFTPで確認するとこれも先ほどど同じディレクトリの/home/xxxxxxxx/直下にありました。
ターミナルで下記を実行するとちゃんとインストールされているか確認できます。
php vendor/phpoffice/phpspreadsheet/samples/index.php
下記のようにpassedになればOKなようです。
Requirement check:
PHP 5.6.0 ...  passed
PHP extension XML ...  passed
PHP extension xmlwriter ...  passed
PHP extension mbstring ...  passed
PHP extension ZipArchive ...  passed
PHP extension GD (optional) ...  passed
PHP extension dom (optional) ...  passed
ログアウトしておきましょう
logout
テストする
エラーを出すようにして下記を[test.php]としてアップしましょう。
[vendor]というディレクトリにある[autoload.php]を読み込む必要があるのですが下記にように絶対パスで指定しました。
ini_set('display_errors', 1);
error_reporting(E_ALL ^ E_NOTICE);

require '/home/xxxxxxxx/vendor/autoload.php';

use PhpOffice\PhpSpreadsheet\Spreadsheet;
use PhpOffice\PhpSpreadsheet\Writer\Xlsx;

$spreadsheet = new Spreadsheet();
$sheet = $spreadsheet->getActiveSheet();
$sheet->setCellValue('A1', 'Hello World !');

$writer = new Xlsx($spreadsheet);
$writer->save('hello world.xlsx');
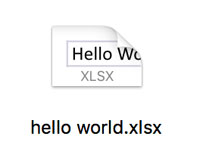
エラーがなければ[test.php]をアップしたディレクトリに[hello world.xlsx]ができるはずです。
自動でダウンロードされるのかと思っていたらサーバ上にできるのでしばらくうまくいってるかどうかわからなくて悩みました。
エクセルをダウンロードする方法もありますのでご安心を
[vendor]を移動する
絶対パスでもなんでも動けばいいのですが、これは[test.php]を置いているディレクトリへ移動しても大丈夫です。その場合は下記のようになります
require 'vendor/autoload.php';
PhpSpreadsheetをMacにインストール
Macのアプリケーション:ユーティリティにあるターミナルを起動します。
composerのインストール
まずcomposerをインストールします。PhpSpreadsheetはこのcomposerを使ってインストールします。
curl -sS https://getcomposer.org/installer | php
下のようにsuccessfullyが出れば成功です。
All settings correct for using Composer
Downloading...

Composer (version 1.8.5) successfully installed to: /Users/xxxxxxxx/composer.phar
Use it: php composer.phar
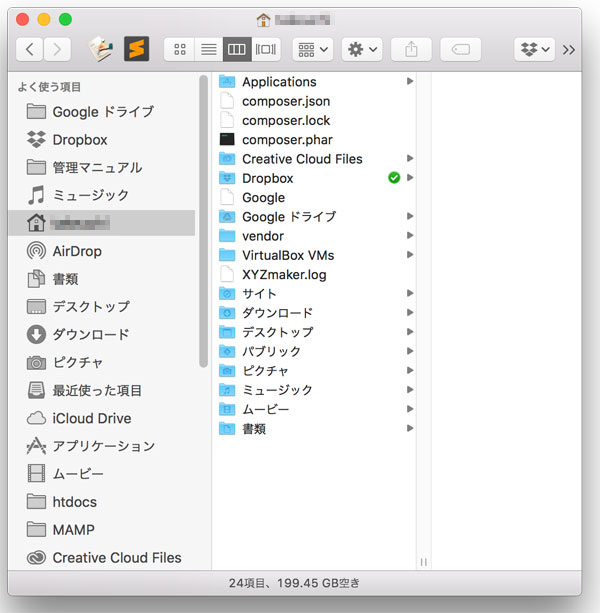
ユーザの[xxxxxxxx]にインストールされたようです。うまくいったか確認するとcomposer.pharは確かにユーザの自分のディレクトリ直下にありました。
PhpSpreadsheetのインストール
続いてインストールです。上で[Use it: php composer.phar]と書かれていますので[composer.phar]を指定します。場所は[/Users/xxxxxxxx/]にあったので下記にようにターミナルに入力します。
/Users/xxxxxxxx/composer.phar require phpoffice/phpspreadsheet
ダウンロードが始まりしばらくすると下記のようになります。
Using version ^1.6 for phpoffice/phpspreadsheet
./composer.json has been created
Loading composer repositories with package information
Updating dependencies (including require-dev)
Package operations: 4 installs, 0 updates, 0 removals
  - Installing markbaker/matrix (1.1.4): Downloading (100%)
  - Installing markbaker/complex (1.4.7): Downloading (100%)
  - Installing psr/simple-cache (1.0.1): Downloading (100%)
  - Installing phpoffice/phpspreadsheet (1.6.0): Downloading (100%)
phpoffice/phpspreadsheet suggests installing mpdf/mpdf (Option for rendering PDF with PDF Writer)
phpoffice/phpspreadsheet suggests installing dompdf/dompdf (Option for rendering PDF with PDF Writer)
phpoffice/phpspreadsheet suggests installing tecnickcom/tcpdf (Option for rendering PDF with PDF Writer)
phpoffice/phpspreadsheet suggests installing jpgraph/jpgraph (Option for rendering charts, or including charts with PDF or HTML Writers)
Writing lock file
Generating autoload files
またまた確認するとこれも先ほどど同じディレクトリの/Users/xxxxxxxx/直下にありました。
ターミナルで下記を実行するとちゃんとインストールされているか確認できます。
php vendor/phpoffice/phpspreadsheet/samples/index.php
下記のようにpassedになればOKなようです。
Requirement check:
PHP 5.6.0 ...  passed
PHP extension XML ...  passed
PHP extension xmlwriter ...  passed
PHP extension mbstring ...  passed
PHP extension ZipArchive ...  passed
PHP extension GD (optional) ...  passed
PHP extension dom (optional) ...  passed
テストする
ダウンロードした[vendor]ですが、ユーザー直下にあっても使いにくいのでMAMPなりテスト環境に移動します。
エラーを出すようにして下記を[test.php]としてテストしましょう。
[vendor]というディレクトリも[test.php]と同じところに置きます。
ini_set('display_errors', 1);
error_reporting(E_ALL ^ E_NOTICE);

require 'vendor/autoload.php';

use PhpOffice\PhpSpreadsheet\Spreadsheet;
use PhpOffice\PhpSpreadsheet\Writer\Xlsx;

$spreadsheet = new Spreadsheet();
$sheet = $spreadsheet->getActiveSheet();
$sheet->setCellValue('A1', 'Hello World !');

$writer = new Xlsx($spreadsheet);
$writer->save('hello world.xlsx');
エラーがなければ[test.php]をのディレクトリに[hello world.xlsx]ができるはずです。
自動でダウンロードされるのかと思っていたらディレクトリに保存されるのでしばらくうまくいってるかどうかわからなくて悩みました。
エクセルをダウンロードする方法もありますのでご安心を

[vendor]をFTPでアップする
さてこの[vendor]ですが、サクラサーバにこのままアップロードしても使えます。わざわざサクラにSSHで繋がなくても大丈夫ですのでご安心ください。
既存のエクセルに書き込んでダウンロードするサンプル
下記は[xlsx/moto.xlsx]を開いてA6にaaaaと書き込んで[ztest.xlsx]というファイル名で保存するプログラムです。お試しください。
require 'vendor/autoload.php';

use PhpOffice\PhpSpreadsheet\Writer\Xlsx as Writer;
use PhpOffice\PhpSpreadsheet\Reader\Xlsx as Reader;

$reader = new Reader();
$spreadsheet = $reader->load('xlsx/moto.xlsx');

$sheet = $spreadsheet->getActiveSheet();

$sheet->setCellValue('A6', 'aaaa');

header("Content-Description: File Transfer");
header('Content-Disposition: attachment; filename="ztest.xlsx"');
header('Content-Type: application/vnd.openxmlformats-officedocument.spreadsheetml.sheet');
header('Content-Transfer-Encoding: binary');
header('Cache-Control: must-revalidate, post-check=0, pre-check=0');
header('Expires: 0');
ob_end_clean(); //バッファ消去

$writer = new Writer($spreadsheet);
$writer->save('php://output');
できあがったExcelがエラーで開かない
そういう時はできあがったExcelをテキストエディタで開いてみてください。エクセルファイルにエラーが記録されています。
まとめ
いかがでしょうか?これなら成功するか失敗するかを事前に確かめることができ、しかもお金がかかりません。失敗してももともとですし、うまく人が集まればそこから収益化していけます。 ぜひシステムを先に作るのではなく先に人を集めるところから考えてみてください。


